Here’s the brutal truth about 99% email deliverability.
When your emails land in spam, you’re invisible. Prospects ignore your outreach. Customers miss your updates. Your revenue takes a hit.
We’ve helped over 500 businesses fix their Google Workspace email delivery. The result? A consistent 99% inbox placement rate.
This isn’t luck. It’s science.
Today, I’m showing you the exact email setup process that separates inbox winners from spam folder losers.

Why Your Google Workspace Deliverability Matters Right Now
Gmail changed the game in February 2024.
New sender requirements mean one thing: mess up your configuration, and your emails die. No second chances.
But here’s the opportunity most people still don’t get it right. Which means if YOU do? You’ll dominate your inbox space.
What does 99% email deliverability actually mean? Simple. Out of 100 emails you send, 99 hit the primary inbox. Not promotions. Not spam. Where people actually read their mail.
That 1% difference? It’s millions in revenue for growing businesses.
💡 Need help setting up Google Workspace?
We’re certified Google partners offering 64% off + free professional setup ($2,000 value). Used by 151+ companies.
Get your quote →The Foundation: Email Authentication (Don’t Skip This)
Email authentication is non-negotiable in 2026.
Without proper SPF, DKIM, and DMARC setup, Gmail treats your emails like strangers at the door. They’re not getting in. For a complete breakdown of email authentication protocols, read our ultimate guide to email authentication.
Setting Up Your SPF Record (The Whitelist)
SPF records tell receiving servers: “These mail servers can send email for my domain.”
Think of it as a bouncer’s list. If you’re not on it, you’re not getting through.
Here’s how to set it up correctly.
Step 1: Access Your DNS Settings
Log into your domain registrar. Could be GoDaddy, Namecheap, Cloudflare—wherever you bought your domain.
Find the DNS management section. Need detailed verification steps? Check our guides for GoDaddy, Namecheap, Cloudflare, or Porkbun.
Step 2: Add Your SPF TXT Record
Create a new TXT record with this exact format:
v=spf1 include:_spf.google.com ~allThat’s it for basic Google Workspace setup.
Using other services? Add them too:
v=spf1 include:_spf.google.com include:servers.mcsv.net ~allCritical warning: You can only have ONE SPF record per domain.
Two SPF records? Both fail. Your email authentication breaks completely.
Pro tip: Keep your SPF under 10 DNS lookups. Each “include:” counts as one lookup. Go over 10, and SPF fails—even if everything else is perfect.
Step 3: Verify It’s Working
Wait 24-48 hours for DNS propagation.
Then send yourself a test email. Check the headers. Look for “spf=pass.”
If you see that? You’re golden.
Configuring DKIM Authentication (The Digital Signature)
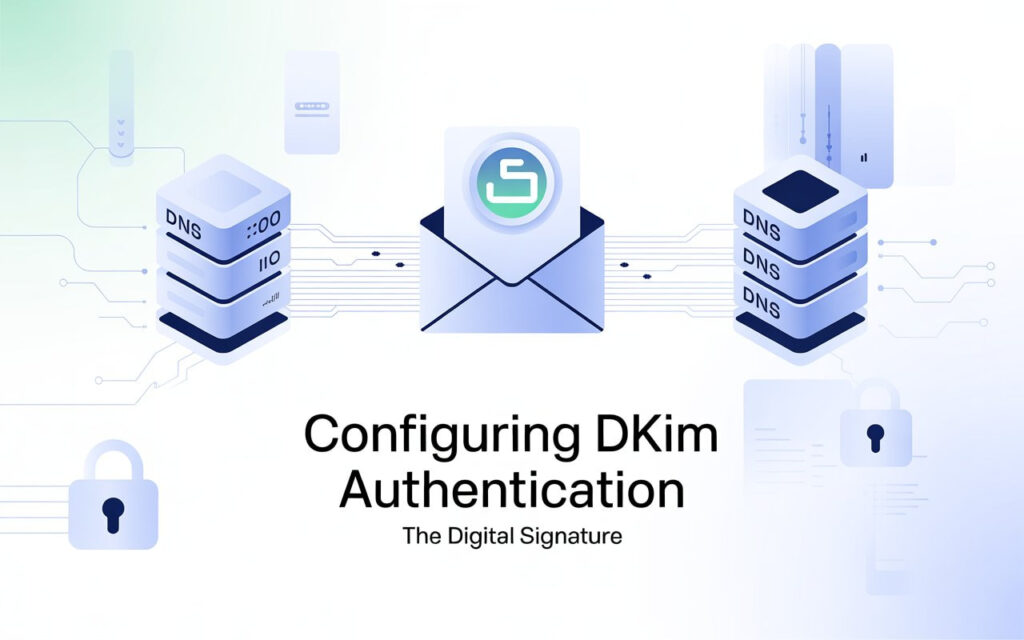
DKIM adds a digital signature to your emails.
It proves your message wasn’t tampered with in transit. Like a wax seal on old letters—if it’s broken, something’s wrong.
Step 1: Generate Your DKIM Key
Sign into Google Admin console.
Navigate to Apps → Google Workspace → Gmail.
Click “Authenticate email.”
Select your domain.
Hit “Generate New Record.”
Choose 2048-bit key length. It’s more secure than 1024-bit.
Step 2: Add DKIM to Your DNS
Google gives you a TXT record with two parts:
- Record name (looks like: google._domainkey)
- Record value (long string of characters)
Copy both. Add them to your DNS settings exactly as shown.
Common mistake: Some registrars auto-append your domain name. If Google says “google._domainkey.yourdomain.com” but your registrar adds “.yourdomain.com” automatically, only enter “google._domainkey.”
Otherwise you’ll create “google._domainkey.yourdomain.com.yourdomain.com” and it won’t work.
Step 3: Activate DKIM
Go back to Google Admin console.
Click “Start Authentication.”
Google verifies the DNS record. Usually takes a few minutes.
When it says “Authenticating email,” you’re done.
Implementing DMARC Policy (Your Last Defense)
DMARC tells receiving servers what to do when SPF or DKIM fails.
It’s your last line of defense against email spoofing.
Step 1: Start with Monitor Mode
Create a DMARC TXT record at “_dmarc.yourdomain.com”:
v=DMARC1; p=none; rua=mailto:dmarc@yourdomain.comThis monitors authentication failures without blocking emails.
Step 2: Analyze Your Reports
Set up an email address to receive DMARC reports (dmarc@yourdomain.com).
You’ll get XML files showing authentication issues and unauthorized sending attempts.
Check these weekly.
Step 3: Enforce Your Policy
After 2-4 weeks of monitoring, tighten the screws:
v=DMARC1; p=quarantine; pct=100; rua=mailto:dmarc@yourdomain.comThis sends failing emails to spam.
Once you’re confident everything legitimate passes? Go nuclear:
v=DMARC1; p=reject; rua=mailto:dmarc@yourdomain.comNow unauthorized emails get blocked completely. Maximum protection.
DMARC alignment rule: Either SPF or DKIM must align with your “From” domain. Both passing? Even better.
Setting Up Google Postmaster Tools (Your Insider Access)
Google Postmaster Tools gives you X-ray vision into how Gmail sees your emails.
It’s like having Gmail’s spam filter whisper its secrets directly to you.
Why This Matters
Without Postmaster Tools, you’re flying blind.
You won’t know your domain reputation. You won’t see your spam rate. You won’t understand why emails fail.
Step 1: Add Your Domain
Visit postmaster.google.com and click the “+” button.
Enter your domain (the one in your DKIM signature).
Step 2: Verify Ownership
Google gives you a TXT record for verification.
Add it to your DNS settings. Click “Verify” in Postmaster Tools.
Step 3: Monitor These Key Metrics
Once verified, check these dashboards daily:
Domain Reputation:
- High = Excellent sender reputation
- Medium/Fair = Occasionally sent spam
- Low = Regularly sends spam
- Bad = Massive spam history
Your goal? Stay at “High” always.
Spam Rate Dashboard:
Keep spam complaints below 0.3%. Gmail’s bulk sender requirements mandate this.
Go above 0.3%? You risk filtering or blocks.
Authentication Dashboard:
Verify 100% of emails pass SPF, DKIM, or both.
Partial authentication means configuration problems.
The Warmup Process (New Accounts Must Do This)
Brand new Google Workspace accounts can’t just blast 2,000 emails on day one.
That looks exactly like a hacked account. Or a spammer.
Email warmup gradually establishes positive sending patterns with Gmail and other providers.
Manual Warmup (For Small Senders)
Sending under 50 emails daily? Manual warmup works perfectly.
Week 1: Build Your Foundation
- Days 1-2: Send 5-10 emails to people who know you
- Days 3-4: Increase to 10-15 emails
- Days 5-7: Hit 20-25 emails
Week 2: Expand Gradually
- Send 30-40 emails daily
- Focus on recipients likely to engage
- Reply to every response promptly
Week 3: Steady Growth
- Increase to 50-75 emails daily
- Monitor Postmaster Tools obsessively
- Keep spam rate under 0.1%
Week 4: Approach Your Target
- Send 100-150 emails daily
- Maintain consistent patterns
- Never spike volume unexpectedly
Warmup Best Practices
Send to engaged contacts first. People who know you will open your emails. High early engagement signals quality to Gmail.
Stay consistent. Don’t send 10 emails Monday, 200 Tuesday, 5 Wednesday. Consistency matters more than total volume.
Engage with replies. Conversations signal legitimate email. Reply to every response during warmup.
Avoid spam triggers early. During warmup, be extra careful with links (keep to 1-2), attachments (avoid them), and promotional language.
Understanding Google Workspace Sending Limits
Google Workspace has limits. Know them. Respect them. Compare Gmail and Outlook limits in our comprehensive guide to daily sending limits.
Free Gmail accounts:
- 500 emails per day via web interface
- 100 emails per day via SMTP
Google Workspace accounts:
- 2,000 emails per day
- 500 during trial period
Critical detail: These limits count recipients, not messages.
One email to 50 people? That’s 50 sends. Send it twice? Now it’s 100.
Safe Sending Volumes for Maximum Deliverability
Gmail’s limits are maximums. Not targets.
For optimal deliverability, send well below limits:
New accounts (first 30 days):
- Start: 10-30 emails daily
- Build to: 100-150 emails daily
- Never exceed 200 daily in this period
Established accounts (30+ days):
- Conservative: 300-500 emails daily
- Moderate: 500-800 emails daily
- Aggressive: 800-1,500 emails daily
Cold email outreach specifically:
- Start: 10-20 emails daily
- Increase: Add 5-10 every 3-5 days
- Maximum: 60-100 daily for cold outreach
Higher volumes risk triggering spam filters.
Content That Gets Delivered (Not Blocked)
Perfect email authentication can’t save spammy content.
Write Like a Human
Spam filters use advanced AI now. They detect marketing-speak and manipulation tactics instantly.
Instead of: “AMAZING OPPORTUNITY!!! Act NOW before it’s GONE!!!”
Write: “Quick question about your content strategy—thought this might help.”
See the difference?
Avoid These Spam Trigger Words
These phrases tank your deliverability:
- Free, guarantee, no obligation
- Act now, limited time, urgent
- Make money, earn income
- Click here, click below
- Multiple exclamation marks!!!
Link Carefully
Email deliverability drops with too many links.
- 0-2 links: Optimal
- 3-4 links: Acceptable
- 5+ links: Spam risk increases exponentially
The Unsubscribe Requirement
Gmail requires one-click unsubscribe for bulk senders (5,000+ daily).
But even below this threshold? Include unsubscribe options.
Missing unsubscribe links increases spam complaints. Spam complaints destroy deliverability.
Make it easy. Make it one-click. Process unsubscribes within 48 hours.
List Management (Your Secret Weapon)
Your contact list quality directly impacts inbox placement.
Verify Before You Send
Never send to unverified addresses. Each bounce hurts your sender reputation.
Use email verification services like ZeroBounce or NeverBounce.
Keep your bounce rate under 3%. Above 5%? You’re in danger territory.
Remove Unengaged Contacts
People who ignore your emails damage your reputation.
Engagement timeline:
- 90 days no engagement: Send re-engagement campaign
- 180 days no engagement: Remove from active list
- 270 days no engagement: Permanent removal
Sounds harsh? It’s necessary.
Gmail watches engagement rates. Low engagement = lower deliverability for everyone on your list.
Monitoring Your Deliverability Daily
Setup is just the beginning. Maintaining 99% deliverability requires daily attention.
Your Daily Checklist
Google Postmaster Tools:
- Check domain reputation (must stay “High”)
- Review spam rate (must stay below 0.3%)
- Verify authentication passing (100%)
- Monitor delivery errors
Email Platform Analytics:
- Open rate (expect 20-40% for engaged lists)
- Click rate (expect 2-5%)
- Bounce rate (must stay below 3%)
- Unsubscribe rate (healthy = below 0.5%)
Warning Signs Requiring Immediate Action
Red flags:
- Domain reputation drops to “Medium” or below
- Spam rate exceeds 0.3%
- Bounce rate exceeds 5%
- Sudden 20%+ drop in open rates
Your response? Stop sending immediately. Investigate. Fix issues. Resume at 25% volume. Gradually return to full capacity over 1-2 weeks.
Troubleshooting Common Issues
Low Open Rates
If open rates drop below 15%, you’ve got problems.
Check these:
- Are emails landing in spam? (Send test to Gmail)
- Is your list engaged? (Review engagement metrics)
- Are subject lines triggering filters? (Remove spam words)
- Wrong sending times? (Test different times)
Increasing Spam Complaints
Spam rate above 0.1%? Here’s why:
You’re sending to purchased lists (don’t do this). Your unsubscribe link is missing. Content doesn’t match expectations. You’re sending too frequently.
Fix it: Add clear unsubscribe links. Verify list quality. Review content for spam triggers. Reduce frequency. Send re-engagement campaigns.
Authentication Failures
DKIM or SPF failing in Postmaster Tools?
Common causes:
- Incorrect DNS configuration
- DNS propagation delays (wait 48 hours)
- Third-party service not authenticated
- Multiple SPF records (only one allowed)
Solutions: Verify DNS records. Test with Google’s Admin Toolbox. Regenerate DKIM if needed.
Your 99% Email Deliverability Action Plan
Here’s your roadmap to inbox placement success.
This Week:
- Verify SPF, DKIM, and DMARC are configured correctly
- Set up Google Postmaster Tools today
- Review last 10 campaigns for spam triggers
- Clean your email list
- Implement daily monitoring routine
This Month:
- Complete warmup process (if using new account)
- Establish baseline deliverability metrics
- Create engagement-based segments
- Set up unsubscribe system
- Analyze DMARC reports weekly
Within 90 Days:
- Achieve consistent 99%+ inbox placement
- Build automated monitoring dashboards
- Optimize based on engagement data
- Document processes
- Train team on deliverability best practices
Where to Buy Google Workspace: Top Authorized Resellers
You can purchase Google Workspace through authorized resellers, which often provide local support, setup assistance, and flexible billing options for businesses. Buying from a trusted reseller ensures you get professional guidance and additional services alongside your subscription.
Top 5 Google Workspace Resellers:
- Leads Monky ( Enjoy up to 70% off with promo code PARTNER2026 (Redeem Here)- Plus free setup and support)
- Agosto (Save up to 10% off on Google Workspace plans with expert migration support)
- Onix (Get up to 5% off on Google Workspace with enterprise-level deployment and support)
- Cumulus Global (Enjoy up to 20% off Google Workspace plans with certified reseller support)
- GsuiteReseller (USA) (Get up to 10% off on Google Workspace plans with dedicated support)
The Bottom Line
Email deliverability isn’t set-it-and-forget-it.
It requires attention, monitoring, and optimization. But follow this guide? You’ll hit 99% deliverability consistently.
The difference between 80% and 99% inbox placement? It’s the difference between mediocre results and business-changing performance.
Your emails deserve to be seen. Your prospects deserve to receive them. Your business deserves the revenue they generate.
Set up your Google Workspace correctly. Monitor it daily. Maintain discipline.
The inbox is waiting.
FAQs
How to send 10,000 emails at once?
Use an email marketing platform or multiple warmed-up domains and accounts instead of a single Gmail account.
How to send 2000 emails per day?
Use a Google Workspace account with proper warmup and stay within the 2,000 recipient daily limit.
What is the +1 Gmail trick?
The Gmail + trick lets you create variations like name+tag@gmail.com that still deliver to the same inbox.
Can you send 1000 emails a day?
Yes, Google Workspace allows up to 2,000 recipients per day if the account is established and properly warmed up.
How to send 1 million emails per day?
Large-scale sending requires email marketing platforms, dedicated infrastructure, and multiple sending domains.
What is the 60/40 rule in email?
Send 60% helpful or educational content and 40% promotional messages to maintain engagement.
How do I send 5000 emails at once in Gmail?
You cannot send 5,000 emails directly from Gmail; you need multiple accounts or an email marketing service.
What is looping ++ in email?
Email looping happens when automated systems repeatedly send messages back and forth due to misconfigured rules.
Is 40 emails a day a lot?
No, sending around 40 emails per day is considered a safe volume for cold outreach.
What is the 3 email rule?
The rule suggests sending one initial email and two follow-ups before stopping outreach.
Can I create 100 Gmail accounts?
You can create multiple Gmail accounts, but Google may restrict or suspend accounts created in bulk.
Is it illegal to spam someone’s email?
Sending unsolicited emails without consent or an unsubscribe option can violate anti-spam laws like CAN-SPAM and GDPR.
Get Google Workspace at 64% Off
Same service. Better price. Professional setup included.
⭐⭐⭐⭐⭐ 151+ companies trust us
Partner Pricing:
• Business Starter: $3/month (Google: $8)
• Business Standard: $13/month (Google: $17)
• Business Plus: $20/month (Google: $26)
FREE:
Complete DNS setup + 24/7 support + USA IPs
15-user minimum | Setup in 24 hours