Your inbox is sitting there. Empty potential.
Most businesses use Google Workspace for emails and doc sharing. That’s it. Meanwhile, your Gmail inbox could be capturing leads, nurturing prospects, and closing deals while you sleep.
Here’s what nobody tells you: Google Workspace lead generation isn’t about fancy tools. It’s about setting up your inboxes correctly, then letting automation do the heavy lifting.
I’ll show you exactly how to transform your Gmail setup into a lead-generating machine. We’ll build everything from scratch—shared inboxes, automated responses, lead tracking, and follow-up sequences. No fluff. Just the system that works.
This Google Workspace setup complements other lead generation strategies for 2025 to create a comprehensive lead capture system.

Why Your Inbox Setup Determines Lead Success
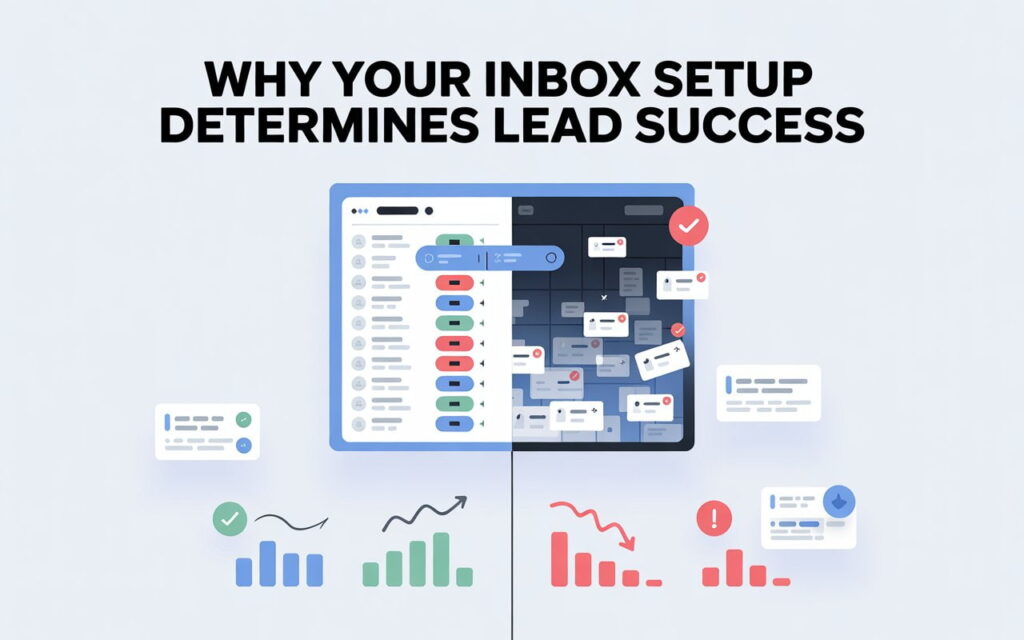
Think about this: a lead fills out your contact form. Where does it go?
If you’re like most businesses, it lands in someone’s personal inbox. Gets buried under 50 other emails. Gets forgotten. Lead lost.
Proper inbox setup prevents this disaster.
When you structure Google Workspace correctly, leads flow into designated spaces. Your team sees them instantly. Follow-ups happen automatically. Nothing slips through the cracks.
The difference between businesses that generate leads consistently and those that don’t? It’s not traffic. It’s inbox architecture. While you’re setting up email capture, also consider B2B lead generation strategies to drive traffic to your forms.
💡 Need help setting up Google Workspace?
We’re certified Google partners offering 64% off + free professional setup ($2,000 value). Used by 151+ companies.
Get your quote →Setting Up Your Lead Capture Inbox
Step 1: Create Your Dedicated Lead Inbox
Stop mixing leads with regular business emails.
Create a new email specifically for lead capture: leads@yourcompany.com or contact@yourcompany.com. This becomes your lead generation hub.
Log into Google Workspace Admin Console at admin.google.com. Navigate to Users > Add new user. Create the dedicated inbox.
Configure it as a collaborative inbox so your team can access it. Go to Groups > Create group. Name it “Sales Team” or “Lead Response Team.”
Add your lead inbox to this group. Now multiple people can monitor incoming leads without sharing passwords.
Step 2: Set Up Inbox Delegation (Team Access)
Gmail delegation lets team members access the lead inbox directly.
Open Gmail with your lead inbox account. Click Settings > See all settings > Accounts. Under “Grant access to your account,” click Add another account.
Add your sales team members one by one. They can now read, respond, and manage leads from their own Gmail interface.
For more details on managing team access, check our complete guide on shared mailbox Google Workspace configuration.
Pro tip: For advanced team workflows with automatic lead assignment and round-robin distribution, Leads Monky’s setup team can configure this during their free onboarding. They handle the technical details so your system runs smoothly from day one.
Step 3: Connect Google Forms to Your Lead Inbox
Now let’s fill that inbox with leads.
Create your Google Forms lead capture form. Keep it simple:
- Name (required)
- Email (required)
- Phone (optional)
- “What can we help you with?” (paragraph text)
- “How did you hear about us?” (dropdown)
Click the three dots in your form > Get email notifications. Enter your lead inbox email address: leads@yourcompany.com.
Every new submission now lands directly in your dedicated inbox. No personal email clutter. Just pure lead generation.
Add the form to your website header, footer, and key landing pages. Embed it or link to it. The more visible, the more leads you’ll capture.
Automating Your Inbox Lead Response
Speed wins in lead generation. The first company to respond gets the deal 78% of the time.
Gmail automation ensures you’re always first.
Setting Up Auto-Response Emails
Open your lead inbox in Gmail. Click Settings > See all settings > Advanced. Enable “Templates.”
Compose your first template email:
Subject: “Thanks for reaching out to [Your Company]!”
Body: “Hi [Name],
Thanks for contacting us! We received your message and someone from our team will respond within 2 hours.
In the meantime, here’s a helpful resource: [link to case study or guide]
Looking forward to connecting soon!
Best, [Your Name]”
Save it as a template. Click the three dots in compose > Templates > Save draft as template.
Create a filter to auto-send this template. Click Settings > Filters and Blocked Addresses > Create new filter.
Set “From” to your Google Forms notification email. Click “Create filter” > Check “Send template” > Select your template.
Now every lead gets an instant response. You’ve started the relationship before you’ve even opened the email.
Building Your Lead Nurture Sequence
One email isn’t enough. Lead nurture requires consistent touchpoints.
Create follow-up templates for different stages:
Day 1 – Personal Response Template: “Hi [Name], I reviewed your inquiry about [Topic]. Here’s how we can help…”
Day 3 – Value Add Template: “Hi [Name], I thought you’d find this helpful: [share case study, video, or resource]…”
Day 7 – Check-In Template: “Hi [Name], just following up to see if you had any questions about…”
Use Gmail’s “Schedule Send” feature to space these out. Don’t blast everyone at once. Stagger your follow-up emails throughout the week.
Track responses by creating Gmail labels: “New Lead,” “First Contact Made,” “Qualified,” “Proposal Sent,” “Closed Won.”
Connecting Your Inbox to Google Sheets CRM
Your inbox captures leads. Your spreadsheet tracks them.
Setting Up Your Lead Tracking System
Create a Google Sheet named “Lead Database 2026.” Add these columns:
- Date Received
- Name
- Phone
- Source
- Status
- Assigned To
- Next Follow-Up Date
- Notes
Connect your Google Forms responses to this sheet. In Forms, click Responses > Sheets icon > Create new spreadsheet.
Now you have two systems working together:
- Gmail inbox for communication
- Google Sheets for tracking and management
Update the sheet whenever you interact with a lead. Change status from “New” to “Contacted.” Add notes about conversations. Schedule next steps.
Use conditional formatting to color-code by urgency. Red for overdue follow-ups. Yellow for today’s tasks. Green for completed leads.
Automating Lead Data Entry
Manual data entry kills productivity.
Use Zapier to connect your inbox to Sheets automatically. When a new email arrives in your lead inbox, Zapier creates a new row in your spreadsheet.
Set up this Zap:
- Trigger: New email in Gmail (leads@yourcompany.com)
- Action: Create spreadsheet row in Google Sheets
- Map fields: Sender email → Email column, Subject → Notes, Date → Date Received
No more copy-pasting. Every lead that hits your inbox appears in your tracking system automatically.
If you need help connecting multiple tools or setting up complex automation workflows, Leads Monky includes these integrations in their setup service—especially helpful for teams running Google Ads or multiple lead sources simultaneously.
Scaling Your Inbox Lead Generation
Once your basic system works, multiply it.
Adding Multiple Lead Sources
Don’t limit yourself to one form.
Create different inboxes for different channels:
- Website form → contact@yourcompany.com
- Google Ads leads → ads-leads@yourcompany.com
- Social media inquiries → social@yourcompany.com
- Partner referrals → partners@yourcompany.com
Tag each source in your Google Sheets. This shows which channels generate the best leads. Cut what doesn’t work. Double down on what does.
Use Gmail aliases to track without creating new accounts. If your main lead inbox is leads@yourcompany.com, you can use leads+website@yourcompany.com, leads+ads@yourcompany.com. All emails arrive in the same inbox but filters can sort them automatically.
Setting Up Lead Assignment Rules
Multiple team members? Auto-assign leads for faster response.
Create a round-robin system using Google Apps Script. When a new lead arrives, the script assigns it to the next available team member.
Install a script in your Google Sheets:
- Open your Lead Database sheet
- Click Extensions > Apps Script
- Paste assignment logic
- Set triggers to run on form submit
Notify assigned team members via email or Slack. They know immediately when a lead is theirs to handle.
Track accountability. Your spreadsheet shows who got which lead and when they responded. No more “I didn’t see it” excuses.
Integrating with Google Ads Lead Forms
Google Ads lead forms capture leads without sending people to your website. Lower friction equals higher conversion rates.
Set up lead form extensions in your Google Ads account. Connect them directly to your Google Workspace through the Google Ads integration.
Leads click your ad, fill out a quick form, and land in your designated Gmail inbox and Google Sheets simultaneously.
Configure instant notifications. When someone submits an ad lead, your team gets an alert within seconds. First to respond usually wins the deal.
If you’re running Google Ads campaigns and want to ensure proper lead form setup plus discounted workspace pricing (up to 70% off), Leads Monky handles both—the ads configuration and the workspace licensing in one package.
Advanced Inbox Lead Generation Tactics
Ready for expert-level lead generation?
Email Signature Lead Capture
Every email you send is an opportunity.
Add a CTA to your Gmail signature: “Interested in [Your Service]? Schedule a free consultation: [Calendar Link]”
Include your lead capture form link below your standard signature. Some people prefer forms over direct replies.
Track signature clicks using UTM parameters. See which team members generate the most leads through their normal correspondence.
Lead Scoring in Your Inbox
Not all leads are equal.
Create Gmail filters that automatically star or label high-priority leads:
- Email from @fortune500company.com → Star + label “Hot Lead”
- Subject contains “urgent” or “ready to buy” → Star + label “Immediate Response”
- Form submission with phone number provided → Label “Warm Lead”
Your team sees priority instantly. High-value leads get responses in minutes, not hours.
Automated Follow-Up Sequences
Use email scheduling tools built into Gmail to create sequences.
Write 5-7 follow-up emails in one sitting. Schedule them to send over 2-3 weeks. Gmail sends automatically while you focus on other work.
Personalize at scale using mail merge tools compatible with Google Workspace. Import your Sheets data. Send customized emails to hundreds of leads with one click.
Measuring Your Inbox Lead Generation Performance
Track what matters.
Create a reporting tab in your Google Sheets:
- Leads captured per week
- Average response time
- Conversion rate (leads to customers)
- Lead source performance
- Revenue per lead source
Set up Google Analytics to track form submissions. Connect it to your Sheets for unified reporting.
Review weekly. What’s working? What’s not? Adjust your inbox setup and processes based on data, not hunches.
Getting Everything Set Up Correctly
Google Workspace lead generation works when configured properly.
Here’s your 90-minute setup checklist:
- Create dedicated lead inbox (15 min)
- Set up Gmail delegation for team access (10 min)
- Build Google Forms lead capture form (20 min)
- Create auto-response templates (15 min)
- Connect Forms to Google Sheets (10 min)
- Set up labels and filters (10 min)
- Test the entire workflow (10 min)
Start simple. Get the basics working. Add automation and advanced features as you grow.
Want everything configured and ready to launch? Leads Monky offers complete Google Workspace setup with lead generation configuration included—forms, inboxes, automation, tracking, and team access. They handle the technical details (including discounted licensing up to 70% off) so you can start capturing leads on day one instead of spending weeks figuring it out.
Your inbox is ready. Your leads are waiting. Time to turn emails into revenue.
Get Google Workspace at 64% Off
Same service. Better price. Professional setup included.
⭐⭐⭐⭐⭐ 151+ companies trust us
Partner Pricing:
• Business Starter: $3/month (Google: $8)
• Business Standard: $13/month (Google: $17)
• Business Plus: $20/month (Google: $26)
FREE:
Complete DNS setup + 24/7 support + USA IPs
15-user minimum | Setup in 24 hours